The Ultimate Guide to Contouring for Long Face Shapes
Discover expert tips and techniques on how to contour for long face shapes. Achieve a balanced and harmonious look with our comprehensive guide.
Contouring is a transformative makeup technique that enhances your facial features by creating shadows and highlights. For those with long face shapes, contouring can help create a more balanced and harmonious look. In this ultimate guide, we will explore the best contouring techniques tailored specifically for long face shapes, provide step-by-step instructions, and share expert tips for achieving a flawless finish.
Understanding Your Face Shape
Before diving into contouring techniques, it's essential to understand what characterizes a long face shape. Long face shapes typically have the following features:
- Length is significantly greater than width.
- Forehead, cheekbones, and jawline are of similar width.
- Often features a higher forehead and longer chin.
Identifying these characteristics can help you determine the best contouring methods to balance your facial proportions.
Essential Tools and Products
To achieve a perfectly contoured look, you'll need a few key tools and products:
- Contour Product: Choose a contour product that is a few shades darker than your skin tone. Creams, powders, and sticks are all suitable options.
- Highlight Product: A highlighter that is a few shades lighter than your skin tone will help emphasize your best features.
- Blending Brushes: Use various brushes or beauty sponges to blend your contour and highlight for a seamless finish.
- Setting Powder: A translucent setting powder helps lock your makeup in place.
Step-by-Step Contouring for Long Face Shapes
Step 1: Prepare Your Base
Start by applying your usual foundation and concealer to create an even base. This will ensure that your contour and highlight products apply smoothly.
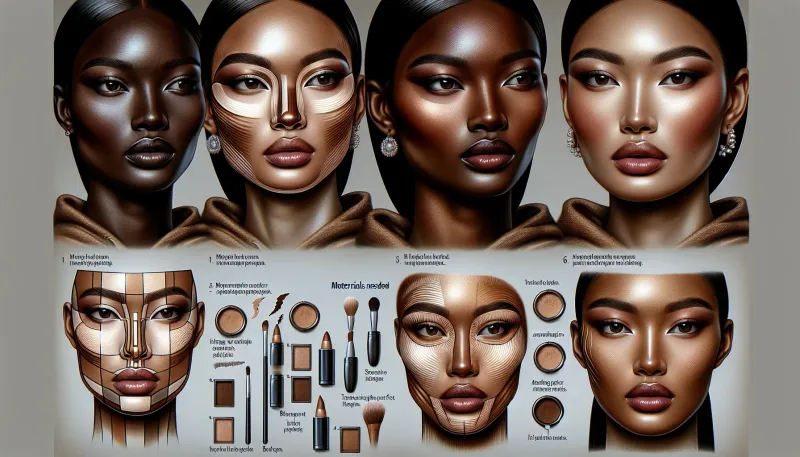
Step 2: Contour
Using your contour product, apply it to the following areas:
- Forehead: Apply contour along the hairline to create the illusion of a shorter forehead.
- Cheekbones: Apply contour slightly below your cheekbones and blend upwards to enhance your natural bone structure.
- Jawline: Contour along the jawline to define it and create a more rounded appearance.
Step 3: Highlight
Now, apply your highlight product to the areas where light naturally hits your face:
- Center of the Forehead: Apply a light amount to the center of your forehead to balance the shading.
- Under the Eyes: Highlight under your eyes to brighten and lift the area.
- Bridge of the Nose: Apply a thin line down the bridge of your nose for a slimming effect.
- Chin: Highlight the center of your chin to help reduce its length.
Step 4: Blend
Blending is crucial for a natural look. Use a beauty sponge or brush to blend the contour and highlight until there are no harsh lines. Make sure to blend upwards and outwards to lift the features.
Step 5: Set Your Makeup
Apply a translucent setting powder to lock your makeup in place and reduce any shine. Pay special attention to the areas where you applied contour and highlight.
Expert Tips and Tricks
- Use Light Layers: Build your contour and highlight in light layers to avoid a heavy or cakey appearance.
- Experiment with Different Products: Creams and liquids blend seamlessly, while powders offer a matte finish. Experiment to find what works best for your skin type.
- Focus on Symmetry: Ensure both sides of your face are symmetrical for a balanced look.
- Blend, Blend, Blend: Blending cannot be stressed enough; it is essential for achieving a natural finish.
- Practice Makes Perfect: Don’t be discouraged if you don’t get it right the first time. Contouring is an art that improves with practice.
Conclusion
Contouring for long face shapes involves specific techniques to balance and enhance your natural features. By following the step-by-step guide and implementing our expert tips, you can achieve a beautifully contoured look that complements your unique face shape. Remember, practice and experimentation are key to mastering the art of contouring.
RELATED ARTICLES


LATEST ARTICLES