Ultimate Guide to DIY Nails for Natural Nails: Step-by-Step Instructions
Learn how to achieve salon-quality nails at home with our ultimate guide to DIY nails for natural nails. Follow our step-by-step instructions for beautiful, healthy nails.
Achieving salon-quality nails at home is not only possible but can also be incredibly satisfying. With the right techniques and a little bit of practice, you can have beautiful, healthy, and stylish nails without ever setting foot in a salon. This guide will walk you through everything you need to know about DIY nails for natural nails, from preparation to maintenance. Let's get started!
Why Choose DIY Nails for Natural Nails?
Many people prefer DIY nails for natural nails due to several reasons. First, it's cost-effective. Regular visits to the salon can add up, while doing your nails at home can save you a significant amount of money. Second, it's convenient. You can do your nails anytime that suits you without needing an appointment. Third, it's a great way to personalize your nail care routine and develop a new skill.
What You'll Need
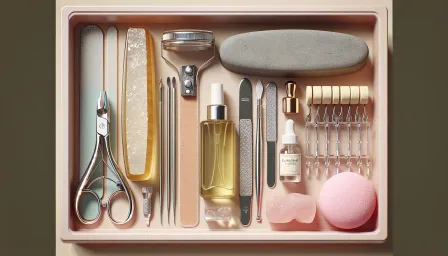
Before getting started, make sure you have the following tools and products:
- Nail polish remover
- Cuticle pusher
- Nail buffer
- Nail clippers
- Nail file
- Base coat
- Top coat
- Nail polish of your choice
- Cuticle oil
- Moisturizer
- Cotton pads or balls
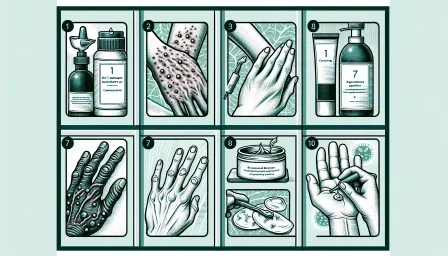
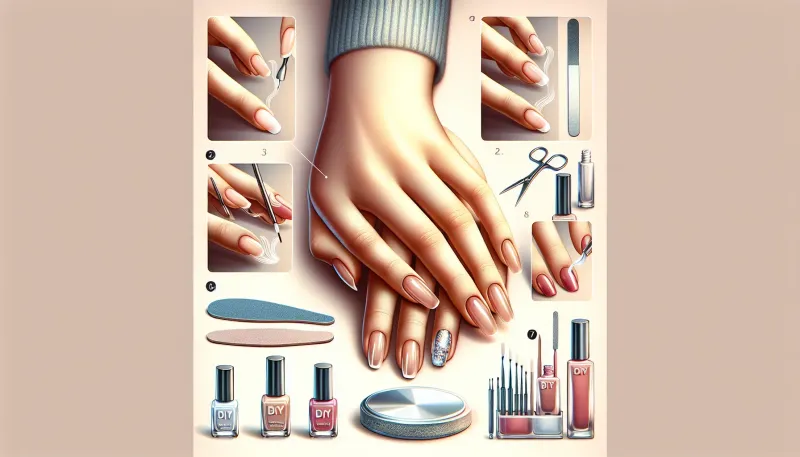
Step-by-Step Instructions for DIY Nails for Natural Nails
Step 1: Preparation
Preparation is key to achieving a flawless manicure. Begin by removing any old nail polish with a gentle nail polish remover. Avoid using acetone-based removers frequently as they can dry out your nails.
Step 2: Shape Your Nails
Use nail clippers to trim your nails to your desired length. Follow up with a nail file to shape your nails. Whether you prefer a square, round, or almond shape, ensure you file in one direction to prevent splitting.
Step 3: Buff and Smooth
Buffing your nails helps to create a smooth surface for polish application. Use a nail buffer to gently buff away ridges and create a slight shine on your natural nails. Be cautious not to over-buff as this can weaken your nails.
Step 4: Push Back Cuticles
Soak your nails in warm water for a few minutes to soften the cuticles. Then, use a cuticle pusher to gently push back the cuticles. Avoid cutting your cuticles as they protect your nail bed from infection.
Step 5: Apply Base Coat
A base coat is essential for protecting your natural nails and ensuring the longevity of your manicure. Apply a thin layer of base coat and allow it to dry completely before moving on to the next step.
Step 6: Apply Nail Polish
Choose your favorite nail polish color and apply the first thin coat to your nails. Allow it to dry before applying a second coat for a more opaque finish. Two thin coats are preferable to one thick coat as it dries faster and lasts longer.
Step 7: Apply Top Coat
Once your nail polish is completely dry, apply a layer of top coat. This not only adds a beautiful shine but also protects your manicure from chipping and extends its wear.
Step 8: Hydrate and Nourish
After your nails are dry, apply cuticle oil to keep your cuticles healthy and moisturized. Follow up with a hand moisturizer to keep your hands and nails hydrated. Regular hydration is key to maintaining strong, healthy nails.
Tips for Maintaining Healthy Natural Nails
Avoid Overusing Nail Polish Remover
Limit the use of nail polish remover to once a week, and opt for acetone-free formulas when possible to prevent your nails from becoming dry and brittle.
Give Your Nails a Break
Occasionally, allow your nails to go bare for a few days. This break helps in reducing the stress on your nails and prevents potential damage caused by constant polishing and removal.
Keep Nails and Cuticles Moisturized
Apply cuticle oil and hand moisturizer daily to keep your nails and cuticles hydrated. This helps in promoting healthy nail growth and prevents hangnails and splits.
Eat a Balanced Diet
A healthy diet rich in vitamins and minerals supports the growth of strong nails. Incorporate foods high in biotin, protein, and zinc, such as eggs, nuts, and leafy greens, into your diet for optimal nail health.
Frequently Asked Questions
How often should I do my nails?
The frequency depends on your nail growth and the longevity of your manicure. On average, doing your nails every two weeks is sufficient to maintain a neat and polished appearance.
Why are my nails peeling or splitting?
Peeling or splitting nails can result from various factors, including excessive exposure to water, lack of hydration, and using harsh nail products. Ensure you moisturize your nails regularly and protect them from harsh chemicals.
Can I use regular nail polish if I have weak nails?
If you have weak or brittle nails, consider using nail strengtheners or treatments specifically designed to promote nail health. These products can be used as a base coat under your regular nail polish.
Conclusion
Doing your nails at home can be a rewarding and cost-effective way to achieve beautiful, healthy nails. By following the steps outlined in this guide, you can master the art of DIY nails for natural nails and enjoy a salon-quality manicure any time you desire. Remember to invest in quality nail care products and take regular breaks to maintain the health of your natural nails. Happy nail painting!
RELATED ARTICLES


LATEST ARTICLES