Ultimate Guide: Acrylic Nails for Beginners — Tips and Tricks to Get Started

Discover the ultimate guide to acrylic nails for beginners. Learn essential tips and tricks to get started with acrylic nails and achieve salon-like results at home.
Acrylic nails have become a staple in the beauty industry, known for their durability, versatility, and the ability to create stunning designs. For beginners, diving into the world of acrylic nails can be both exciting and intimidating. This comprehensive guide aims to provide you with the essential information, tips, and tricks to get started on your acrylic nail journey.
What Are Acrylic Nails?
Acrylic nails are a type of artificial nail enhancement made by combining a liquid acrylic product (monomer) with a powdered acrylic product (polymer). This combination creates a hard, protective layer that's perfect for extending and strengthening natural nails. Acrylic nails are known for their long-lasting wear and can be customized into various shapes, lengths, and designs.
Benefits of Acrylic Nails
Before getting started, it’s essential to understand the benefits of acrylic nails:
- Durability: Acrylic nails are resilient and can withstand more wear and tear than natural nails.
- Versatility: They can be shaped and designed in endless styles, allowing for creativity and personalization.
- Length and Shape: They provide an immediate length and shape, perfect for those who struggle to grow their nails.
- Protection: Acrylic nails protect the natural nails underneath, reducing breakage.
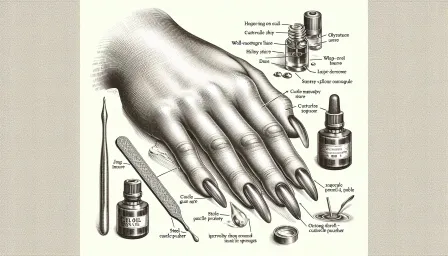
Essential Tools and Products
To successfully apply acrylic nails, you'll need several key tools and products:
- Acrylic Liquid (Monomer): The liquid component mixed with the powder to create the acrylic.
- Acrylic Powder (Polymer): The powder component that hardens when combined with the liquid.
- Nail Brushes: Special brushes used to apply the acrylic mixture to the nails.
- Nail Tips/Forms: Used to extend the length of your natural nails.
- Nail Primer: Prepares the natural nails for acrylic application by removing oils and ensuring better adhesion.
- Nail Files and Buffers: For shaping and smoothing the nails.
- Cuticle Pusher: Helps to push back the cuticles for a cleaner application.
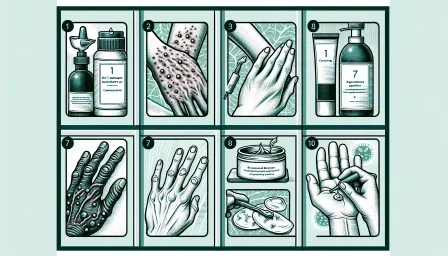
Step-by-Step Guide to Applying Acrylic Nails
Follow these steps for a salon-worthy application:
1. Prepare Your Nails
Start with clean, dry nails. Push back your cuticles using a cuticle pusher and file your natural nails lightly to remove shine. This creates a better surface for the acrylic to adhere to. Apply a nail dehydrator and primer to remove oils and improve adhesion.
2. Choose the Right Nail Tips or Forms
If you're using nail tips for length, select the appropriate size for your nails and apply them using nail glue. For nail forms, position them under your natural nail edges.
3. Mix the Acrylic
Dip your brush into the acrylic liquid, then into the acrylic powder to form a small bead. The consistency should be smooth and workable, not too runny or too dry.
4. Apply the Acrylic
Starting near the cuticle, place the acrylic bead and gently press and shape it towards the free edge. Work quickly as the acrylic will begin to harden. Continue adding beads as necessary to build the desired thickness and shape. Ensure a smooth and even application.
5. Shape and Buff
Once the acrylic has fully hardened, use a nail file to refine the shape and length of your nails. Buff the surface to remove any bumps and achieve a smooth finish. This step ensures your nails look natural and flawless.
6. Final Touches
Apply a topcoat to add shine and protect your acrylic nails. You can also paint and design your nails as desired. Ensure to apply cuticle oil to keep your cuticles hydrated and healthy.
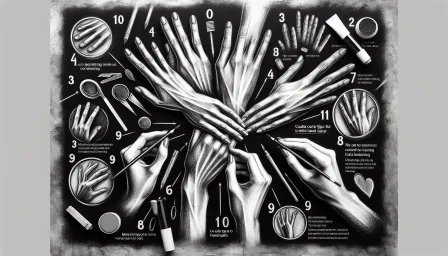
Common Mistakes to Avoid
Even with the best intentions, beginners can make mistakes when applying acrylic nails. Here are some common errors and how to avoid them:
- Skipping Nail Prep: Improper nail preparation can lead to lifting and poor adhesion. Always cleanse and prime your nails.
- Incorrect Acrylic Consistency: Too wet or too dry acrylic can make application difficult. Aim for a smooth, workable consistency.
- Thick Application: Excessively thick acrylic can look unnatural and be prone to lifting. Apply thin, even layers.
- Overfilling Nails: Overfilling can cause damage to the natural nail. File gently and avoid aggressive filing.
- Neglecting Aftercare: Acrylic nails require maintenance. Regular fills, proper hydration, and avoiding harsh chemicals will prolong their life.
Aftercare Tips for Acrylic Nails
Maintaining your acrylic nails will keep them looking fresh and prevent damage. Consider these aftercare tips:
- Avoid Using Nails as Tools: Using your nails to open packages or perform tasks can cause them to break.
- Regular Fills: Schedule fills every 2-3 weeks to maintain your acrylic nails’ stability and appearance.
- Hydrate: Apply cuticle oil and hand moisturizer daily to keep your nails and skin healthy.
- Avoid Harsh Chemicals: Use gloves when cleaning or handling chemicals to prevent damage to your acrylic nails.
Conclusion
Starting with acrylic nails can be an exciting adventure, offering endless possibilities for nail art and design. By understanding the basics, using the right tools, and following the application and aftercare steps outlined in this guide, you can achieve professional-looking results from the comfort of your home. Remember, practice makes perfect, and with time, you'll be creating stunning acrylic nails effortlessly. Happy nail crafting!
RELATED ARTICLES


LATEST ARTICLES