Contour for Triangle Face Shapes: Expert Tips and Techniques
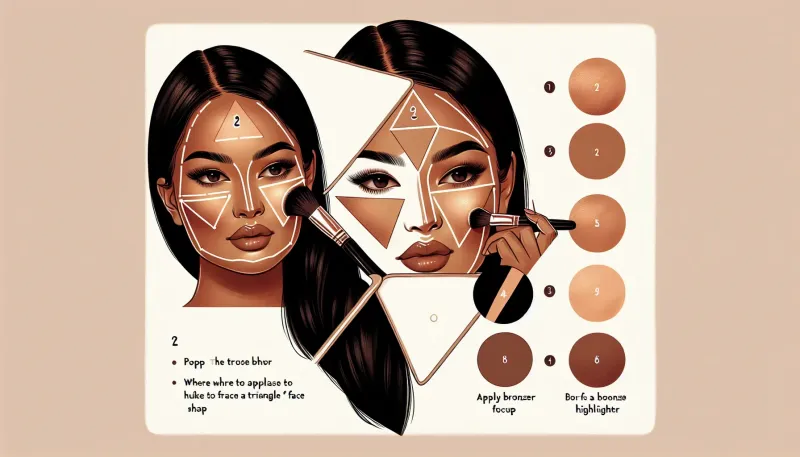
Discover expert tips and techniques for contouring triangle face shapes. Learn how to enhance your unique facial features with our comprehensive guide.
Introduction
Contour makeup has taken the beauty world by storm, transforming how individuals enhance their facial features. For individuals with triangle face shapes, the art of contouring can help balance the broader forehead with a narrower chin. In this article, we will delve into expert tips and techniques for contouring triangle face shapes, ensuring you highlight your best features and achieve a harmonious look.
Understanding the Triangle Face Shape
The triangle face shape, often referred to as pear-shaped, is characterized by a prominent forehead that gradually narrows down to a smaller, pointed chin. Recognizing your face shape is the first step towards effective contouring, as it allows you to create the illusion of balanced proportions.
Essential Tools and Products for Contouring
Contour Kits
Contour kits typically include a range of shades designed to help you sculpt and define your facial features. For triangle face shapes, opt for a kit with both dark and light shades. The darker shades will be used to minimize the broader forehead, while the lighter shades will highlight the chin area.
Blending Brushes
High-quality blending brushes are essential for achieving a seamless contour. Brushes with soft bristles will help you blend the contour lines effectively, ensuring a natural finish.
Beauty Sponges
Beauty sponges are perfect for blending and setting your contour makeup. They can be used to apply both cream and powder products, providing a flawless finish.
Step-by-Step Contouring Guide for Triangle Face Shapes
Step 1: Foundation Base
Start with a clean, moisturized face, and apply a foundation that matches your skin tone. This will create an even canvas and help your contour makeup blend more smoothly.
Step 2: Applying Dark Shades
Using a dark contour shade, apply the product along your hairline and the outer edges of your forehead. Blend the product towards the center to create a shadow effect, minimizing the width of your forehead. Additionally, apply the dark shade along your jawline, blending towards the chin.
Step 3: Highlighting
Using a light contour shade or highlighter, apply the product to the center of your forehead, down the bridge of your nose, and on your chin. This will draw attention to the center of your face, creating balance and symmetry.
Step 4: Blending
Blend both the dark and light contour shades using a blending brush or beauty sponge. Ensure there are no harsh lines, and the makeup appears seamless and natural.
Step 5: Setting the Makeup
Set your contour makeup with a translucent powder to ensure it stays in place throughout the day. This will also help to mattify any shine and give your makeup a long-lasting finish.
Step 6: Final Touches
Optional but recommended, apply blush to the apples of your cheeks and a subtle highlighter on your cheekbones for added dimension and glow.
Common Mistakes to Avoid
While contouring can transform your look, common mistakes can detract from achieving the desired effect. Here are some pitfalls to avoid:
Over-Contouring
Applying too much product or using overly dark shades can make your makeup look unnatural. Start with minimal product and build gradually, blending thoroughly to achieve a subtle, natural finish.
Incorrect Placement
Placing contour lines incorrectly, such as too low on your forehead or too high on your jawline, can create an unbalanced appearance. Follow a guide to ensure proper placement, emphasizing the areas you want to minimize or highlight.
Poor Blending
Not blending the contour shades properly can result in harsh lines and an uneven appearance. Take your time with blending to ensure the shades transition smoothly into your natural skin tone.
Expert Tips for a Flawless Finish
Use Multi-Functional Products
Consider using products that serve multiple purposes, such as cream sticks that can be used for both contouring and highlighting. This can simplify your routine and help maintain consistency in texture and finish.
Adapt to Lighting
Always apply your makeup in natural light, if possible, to ensure true color visibility and blending. This helps you avoid over or under-applying products.
Regular Practice
Practice makes perfect. Take the time to practice your contouring technique to understand how different products work with your unique face shape. Regular practice will improve your skills and confidence.
Conclusion
Contouring a triangle face shape requires precision and the right technique. By following these expert tips and utilizing the proper tools and products, you can enhance your facial features, create balance, and achieve a flawless makeup look. Remember, the key to successful contouring is practice, patience, and a good understanding of your unique face shape. Embrace your beauty and have fun experimenting with different styles and techniques!


