Top Tips for Applying Individual False Lashes for Custom Placement
Discover expert tips for applying individual false lashes for custom placement. Achieve a natural and personalized look with these step-by-step guidelines.
Creating a striking look often involves enhancing your eyelashes. While strip lashes can be great, individual false lashes for custom placement offer a more tailored and natural appearance. This article will provide you with invaluable tips for applying these lashes to achieve your desired look.
Understanding Individual False Lashes
Individual false lashes come in small clusters or as single strands, allowing for more precise application. They can be applied in a way that adds fullness where needed, creates a desired shape, or simply enhances the natural lashes. This versatility makes them a favorite for both everyday wear and special occasions.
Tools and Materials Needed
Eyelash Glue
Using the right adhesive is crucial for the longevity and comfort of your lashes. Opt for a high-quality, waterproof eyelash glue, ideally one that dries clear to avoid any noticeable residue.
Tweezers
Tweezers provide the precision needed for handling individual lashes. Slant-tip tweezers are generally recommended as they offer more control.
Magnifying Mirror
A magnifying mirror can make the process of applying individual lashes much easier, allowing you to see exactly where each lash is being placed.
Spoolie Brush
A spoolie brush helps in blending the false lashes with your natural lashes, ensuring a seamless look.
Small Scissors
Small, precise scissors are useful for trimming individual lashes to suit your natural lash line better or to create specific lengths.
Step-by-Step Guide to Applying Individual False Lashes
Step 1: Prep Your Natural Lashes
Start with clean, makeup-free lashes. Curl them using an eyelash curler and apply a light coat of mascara. This will help the individual false lashes blend seamlessly with your natural lashes.
Step 2: Choose the Right Lashes
Select individual lashes of varying lengths for a more natural look. For example, shorter lashes can be used for the inner corners of the eyes, while longer lashes can be applied to the outer corners for a slight winged effect.
Step 3: Apply the Adhesive
Place a small drop of eyelash glue onto a clean surface or the back of your hand. Using tweezers, pick up an individual lash and dip the base into the glue. Wait a few seconds for the glue to become tacky; this helps the lash adhere better.
Step 4: Placement
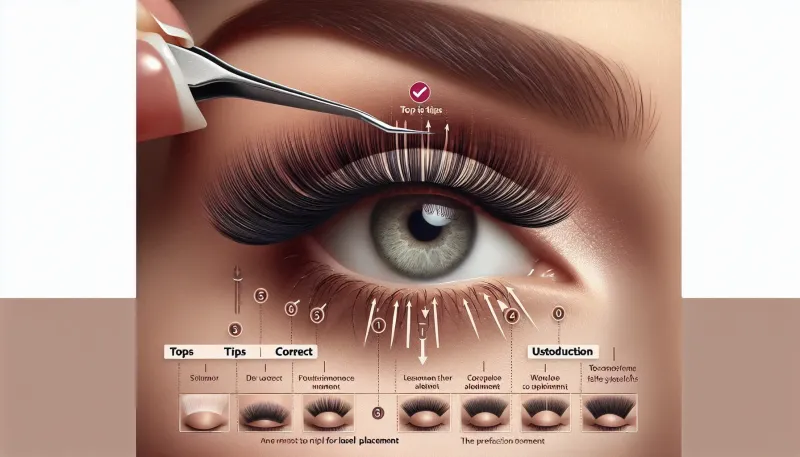
Using the magnifying mirror, gently place the individual lash on your natural lash line, starting from the outer corner and working your way in. Make sure the lash is secure by lightly pressing it with the tweezers to ensure adhesion.
Step 5: Blend Lashes with a Spoolie Brush
Once all the individual lashes are in place, blend them with your natural lashes using a spoolie brush. This will help the false lashes look more integrated and natural.
Step 6: Optional - Apply Another Coat of Mascara
If needed, apply another light coat of mascara to further blend your natural lashes with the individual false lashes. Be gentle to avoid dislodging any lashes.
Common Mistakes to Avoid
Applying Too Much Glue
Using too much glue can make lashes difficult to place and can cause visible glue clumps. Always use a small amount of adhesive for the best results.
Not Waiting for the Glue to Become Tacky
Patience is key. Waiting for the glue to become tacky before applying will make placement much easier and more precise.
Placing Lashes Too Far from the Lash Line
Positioning the lashes too far from your natural lash line can make them look obvious and less natural. Ensure they are as close as possible for a seamless look.
Neglecting to Blend False and Natural Lashes
Failing to blend the false lashes with your natural lashes can result in an uneven and artificial appearance. Always use a spoolie brush to integrate the lashes fully.
Maintaining Your Individual False Lashes
Proper care ensures the longevity of your lashes and maintains their natural look.
Cleaning
Remove your lashes carefully using an oil-free makeup remover. Clean any adhesive residue gently to keep them reusable.
Storage
Store your individual lashes in their original packaging to maintain their shape and quality.
Avoid Excessive Mascara
Excessive use of mascara can damage individual lashes and make them harder to clean. Use mascara sparingly to prolong the lifespan of your lashes.
Conclusion
Applying individual false lashes for custom placement can seem daunting at first, but with the right tools, techniques, and a bit of practice, you can achieve a natural and personalized look. Remember to be patient and gentle throughout the application process, and avoid common mistakes for the best results. Whether you are enhancing your everyday look or preparing for a special occasion, individual lashes offer the flexibility and precision needed to achieve your desired appearance.


